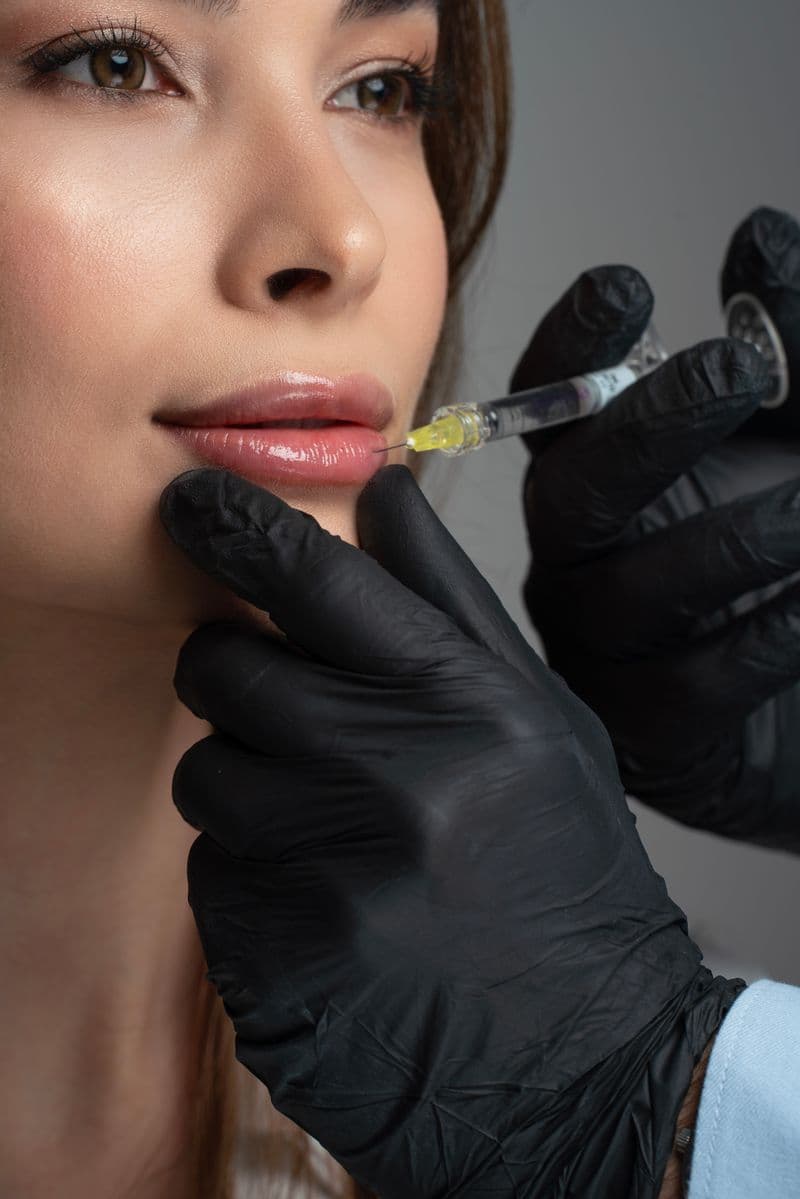
Wait at least 24 hours before applying lipstick after lip filler — 48 hours is the standard clinical recommendation. This is not an arbitrary restriction: the needle punctures used to inject filler are open micro-wounds, and cosmetics applied over them introduce bacteria, fragrances, and preservatives directly into the dermis. Beyond infection risk, applying lipstick requires rubbing and pressure that can displace filler before it integrates with surrounding tissue.
This guide covers every makeup rule that applies in the first week post-filler, explains the biology behind each restriction, and tells you exactly which products to use (and which to avoid) once the waiting period is over.
Why Makeup and Fresh Filler Don't Mix
Hyaluronic acid filler (Juvederm, Restylane, Belotero, and similar brands) is injected through multiple needle punctures along the lip. Each puncture is a wound — small, but open to the environment for several hours afterward.
Three distinct risks arise when you apply cosmetics too soon:
1. Infection via open punctures Bacteria live on the surface of every lip product, brush, and finger. Applying makeup over fresh injection sites gives those bacteria a direct path into the dermis, bypassing the skin's normal barrier. Lip infections after filler, while uncommon, present as red, warm, swollen lips that do not resolve like normal swelling — and they require antibiotics or, in severe cases, hyaluronidase dissolution of the filler.
2. Filler displacement via mechanical pressure Filler has not integrated with the surrounding hyaluronic acid network in surrounding tissue for at least 24–48 hours. Rubbing lipstick on, blotting it off, reapplying — each action applies lateral pressure to the lip. This pressure can migrate filler from its intended location, causing asymmetry or lumps that were not there immediately post-treatment.
3. Inflammatory reaction to cosmetic ingredients Fragrances, dyes, preservatives (particularly parabens and phenoxyethanol), and active ingredients like vitamin C and AHAs can cause contact dermatitis in compromised skin. With the lip barrier disrupted by injection, these ingredients reach deeper tissue layers where they normally don't penetrate — increasing reaction risk.
The Lip Filler Makeup Timeline
First 4 hours: Nothing on the lips
In the immediate post-treatment period, keep the lips completely clean and unobstructed. Do not apply even a lip balm for the first four hours. This window allows:
- Injection sites to begin closing
- Initial inflammatory response to peak and start to resolve
- Filler to begin settling into position
If the lips feel dry or tight, a single application of a plain, fragrance-free petroleum jelly (Vaseline original, unflavored) is acceptable — but apply it gently with a clean fingertip, not a tube applicator that may have been contaminated.
Hours 4–24: Lip balm only, applied with care
After four hours, the injection sites have closed sufficiently to allow a gentle, fragrance-free lip balm. Aquaphor, Vaseline, or a plain hydrating balm without added flavor, fragrance, or active ingredients is appropriate. Apply with a clean finger — not a brush, not the tube directly.
Do not apply lipstick, lip liner, lip gloss with applicators, or anything with pigment during this window.
24–48 hours: Light, hydrating products permitted
At 24 hours, you can introduce a light hydrating lip product — a sheer tinted balm, a non-pigmented gloss, or a gentle tinted moisturizer applied to the lips. Keep application light and avoid friction.
Most patients are comfortable applying lipstick at 24 hours, though the clinical recommendation is to wait 48 hours. If your lips are still significantly swollen or tender at 24 hours, postpone.
48 hours–1 week: Standard makeup, with product caveats
After 48 hours, you can resume your normal lip makeup routine with two important caveats:
-
Avoid matte lipsticks for the first week. Matte formulas require more friction to apply evenly and are harder to remove, requiring scrubbing. Both the application and removal phases add mechanical stress to lips that are still integrating filler and resolving residual inflammation.
-
Avoid lip plumpers for the first week. Products containing capsaicin, peppermint oil, cinnamon, or menthol work by causing local vasodilation — intentionally making the lips swell. This vasodilation worsens post-filler swelling and can cause discomfort on injection sites that have not fully healed.
After 1 week: No restrictions
By day 7–10, the filler has integrated, injection sites are fully healed, and swelling has largely resolved. You can resume all lip products including matte lipstick, lip plumpers, and exfoliating lip scrubs.
The 6 Makeup Rules for Lip Filler Recovery
Rule 1: No touching the injection sites for 4 hours
This applies to both makeup and your hands. Every unnecessary contact with fresh injection sites is a contamination and pressure risk.
Rule 2: Use a clean applicator every single time
During the first week, avoid dipping fingers back into product jars. Use a clean spatula or single-use applicator. If you use a lip brush, wash it before every use.
Rule 3: Skip the lip liner for 48 hours
Lip liner pencils are applied with pressure, traced precisely at the vermilion border — the exact area most affected by swelling and tenderness. The pressure required to draw a precise line at the border of lips that are still swollen can cause minor filler displacement.
Rule 4: Remove makeup gently — no rubbing
When removing lip makeup during the first week, use a micellar water and a soft cotton pad. Press and hold for 10 seconds to dissolve the product, then wipe with minimal friction. Do not use makeup wipes that require scrubbing, and do not use oil-based removers that require massaging into the skin.
Rule 5: Avoid active ingredients on and around the lips
For the first week, skip any products applied near the lip area that contain:
- Retinol / retinoids
- Alpha hydroxy acids (glycolic, lactic, mandelic)
- Beta hydroxy acids (salicylic)
- Vitamin C (ascorbic acid)
- Benzoyl peroxide
These actives work by disrupting the skin barrier — the opposite of what healing tissue needs.
Rule 6: Do not use lip scrubs or exfoliators for 2 weeks
Physical lip scrubs (sugar scrubs, silicone massagers) and chemical exfoliators should be completely avoided for 14 days. The micro-abrasion of scrubbing is contraindicated over healing tissue, and exfoliation prolongs the inflammatory phase of wound healing.
What Lip Products Are Safe After 48 Hours
Once you've cleared the 48-hour window, these types of products are appropriate:
- Satin or cream lipsticks: Hydrating formulas that glide on with minimal friction.
- Sheer lip colors: Low pigment load means lighter application and easier removal.
- Hydrating lip glosses: Without applicators that require pressing firmly onto the lip.
- Fragrance-free lip balms: As a base layer under color to reduce friction during application.
Products to continue avoiding through day 7:
- Matte lipstick (any formula labeled "matte," "velvet," or "transfer-proof")
- Lip plumpers
- Lip stains (require scrubbing to remove)
- Lip treatments containing AHAs or retinol
Managing Swelling While Maintaining Your Look
The hardest part of lip filler aftercare for most patients is not the restriction on makeup — it is the swelling itself. Lips look their largest in the first 24–48 hours, and for first-time patients, this can be alarming or socially uncomfortable.
Practical strategies:
- Cold compresses reduce swelling fastest. A wrapped ice pack held gently against the lips for 10 minutes every hour during the first 4–6 hours noticeably reduces peak swelling.
- Sleep elevated: An extra pillow prevents fluid pooling in the face overnight.
- Skip the social calendar for day one: Not mandatory, but swelling at 12 hours often looks dramatically worse than the final result. Waiting to see anyone critical until day 3 spares you the "you look overdone" reaction when you don't.
- Arnica gel applied around (not directly on) the injection sites may reduce bruising.
- Stay hydrated: Hyaluronic acid binds to water molecules — adequate hydration helps the filler behave as intended and supports tissue recovery.
Your First Week: Day-by-Day Summary
| Day | Swelling status | Makeup permitted |
|---|---|---|
| Day 0 (treatment day) | Peaks 4–12 hours | Nothing for 4 hrs; plain petroleum jelly only |
| Day 1 | Still significant, starting to ease | Fragrance-free lip balm; no lipstick |
| Day 2 | Notably reduced | Light, hydrating products; first lipstick OK (cream/satin only) |
| Day 3–4 | Mild, mostly residual | All products except matte and plumpers |
| Day 5–7 | Minimal | All products except matte lipstick; no scrubs |
| Day 7+ | Near-final result visible | No restrictions |
The Takeaway for Clinics
If you treat patients with lip filler, the single most common aftercare question you will receive is about makeup — specifically lipstick. Patients want to know exactly when, exactly what, and exactly why.
A personalized written aftercare sheet handed over at the end of the appointment — with product-specific guidance, a clear timeline, and your clinic's contact information — dramatically reduces follow-up calls and patient anxiety. It also reduces adverse events: patients who understand the why behind restrictions are significantly more likely to follow them.
Related guides: lip filler swelling stages day by day · how long after lip filler can you exercise · dermal fillers aftercare
AftercareGen generates professional, clinic-branded aftercare instructions for lip filler and 12 other aesthetic procedures in seconds. Generate a PDF your patients actually read.
Stop photocopying aftercare sheets
Generate Lip Filler aftercare instructions branded with your clinic name in under 60 seconds. 3 free sheets per day — no credit card.
Generate your first sheet freeGet the free aftercare template pack
Generators for all 13 aesthetic procedures plus practical guides on running aftercare in your clinic. Sent once — no spam, ever.
Frequently asked questions
About the author
Dr. Megan Cole, RN, BSN
Aesthetic Nurse Practitioner
Registered Nurse with 12+ years in medical aesthetics. Certified injector (AAFE) specializing in neurotoxins and soft-tissue fillers. Clinical educator for aesthetic nursing programs.
View profile