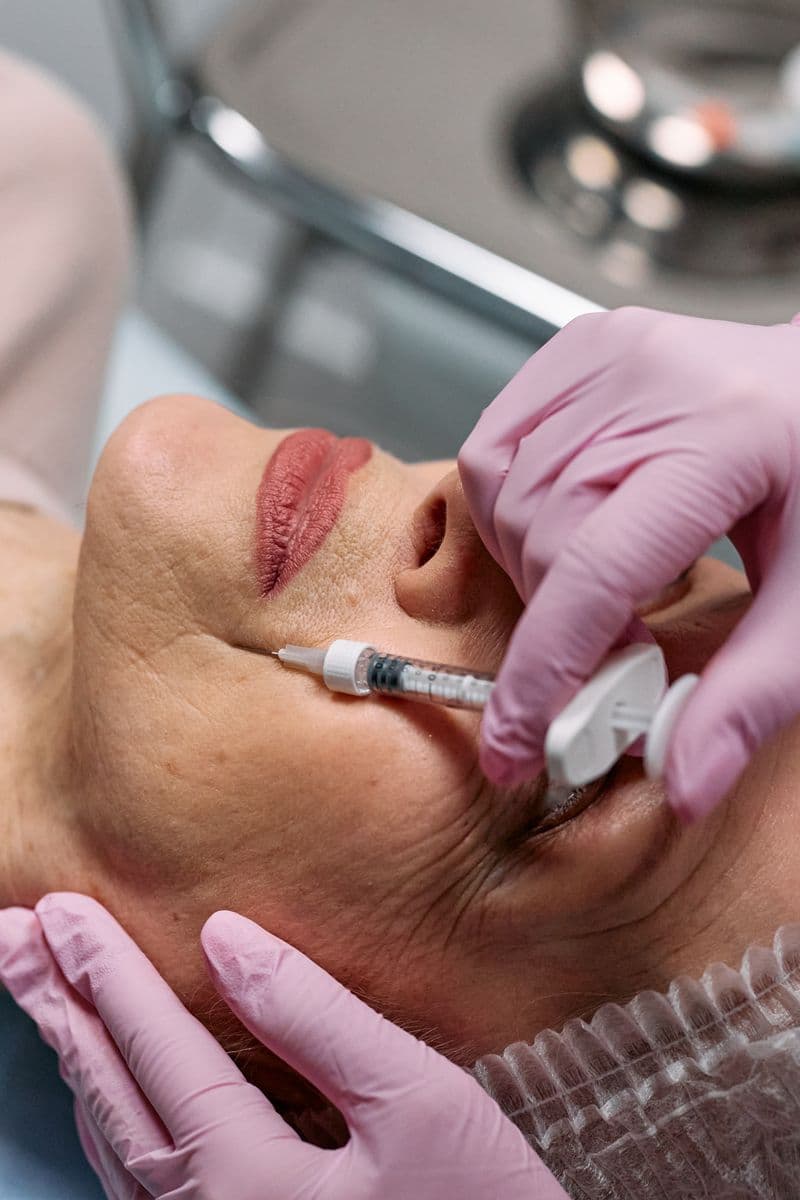
Dermal filler swelling peaks at 24–48 hours and resolves for most patients within 3–5 days. The full, final result — the one you should actually judge — takes 2 weeks to appear, once all swelling has resolved and the hyaluronic acid has fully integrated with surrounding tissue.
What happens in those 2 weeks is determined partly by the injection itself and significantly by what you do afterward. This guide covers everything: the day-by-day timeline, the restrictions that matter and why, and the warning signs that distinguish normal healing from a complication that needs attention.
Why Filler Needs Time to Settle
Hyaluronic acid (HA) filler — Juvederm, Restylane, Sculptra, Belotero, and their variants — is injected as a gel into specific tissue planes (superficial dermis, deep dermis, or subcutaneous fat, depending on the indication and product). After injection, three things happen simultaneously:
- Inflammatory response: The needle trauma causes localized histamine release, fluid accumulation (edema), and vascular dilation — this is the swelling you see.
- Hydration uptake: HA is hygroscopic, meaning it attracts and binds water molecules. In the first 24–72 hours, the filler absorbs surrounding tissue fluid, which temporarily adds to swelling but is part of how the filler achieves its final volume.
- Integration: Over 2–4 weeks, the filler gel integrates with the native HA matrix in surrounding connective tissue, becoming less mobile and more stable.
Until integration is complete, the filler is mechanically vulnerable to displacement by pressure, heat, and manipulation. This is the core reason for the post-treatment restrictions.
The Recovery Timeline: Day by Day
Day 0 — Treatment day
Expect the treated areas to appear swollen, possibly significantly so. Injection sites will have small, mosquito-bite-like bumps where the needle or cannula entered. The filler itself may create a slight overfilled appearance — this is intentional, as injectors account for some settling.
What to do:
- Apply a cold compress (wrapped in cloth — never ice directly on skin) for 10 minutes every hour for the first 4–6 hours
- Keep your head elevated; avoid lying flat or face-down
- Take paracetamol if needed for discomfort — avoid ibuprofen or aspirin (blood thinners that worsen bruising)
- Drink water; stay hydrated
- Avoid alcohol, heat, exercise, and sun exposure for the rest of the day
What to avoid:
- Makeup for at least 4–6 hours (ideally 24 hours)
- Touching, pressing, or massaging the treated areas
- Exercise, including brisk walking beyond gentle activity
- Hot drinks, hot showers, saunas, or any heat source
- Alcohol
Days 1–2 — Peak swelling
Swelling typically reaches its maximum on day 1 or day 2. The treated areas may look significantly more voluminous than you expected or wanted — this is normal and does not represent your final result.
Bruising, if present, will be at its most visible on days 1–2. Bruising from filler occurs when small blood vessels are disrupted during injection; it is more common in highly vascular areas (lips, tear trough, nasolabial folds) and in patients who are on blood thinners or supplements (fish oil, vitamin E, aspirin, ginkgo).
What to do:
- Continue cold compresses for the first 24–48 hours
- Apply arnica gel to bruised areas (not directly on injection sites)
- Sleep with your head slightly elevated
- Eat a low-sodium diet to reduce water retention
- Gentle, cool face wash with a fragrance-free cleanser
What to avoid:
- Vigorous exercise or anything that significantly elevates heart rate for 48 hours
- Heat: hot yoga, saunas, steam rooms, very hot showers
- Alcohol for 48 hours
- Dental appointments or invasive facial procedures for 2 weeks
- Facial massage, gua sha, or any instrument applied to the face
Days 3–5 — Visible improvement
By day 3, most patients notice a significant reduction in swelling. The treated areas begin to look closer to the final result, though minor puffiness persists. Bruising begins to change color (blue/purple → yellow/green as it resolves).
This is a good time to gently assess asymmetry — though do not make any judgment calls before the 2-week mark. Apparent asymmetry at day 3–5 is usually swelling-related, not a filler placement issue.
What to do:
- Return to most normal activities including light exercise
- Makeup can be applied normally; continue to apply gently near injection sites
- Return to your normal skincare routine, avoiding active ingredients (retinol, AHAs) directly over injection sites for a few more days
What to avoid:
- High-impact exercise if you still have visible bruising or significant tenderness
- Professional facial treatments (facials, microdermabrasion, chemical peels) — wait 2 weeks
Days 7–14 — Integration phase
The filler is integrating with surrounding tissue during this window. Visible swelling is largely gone for most patients. Small, palpable (feel-able but not visible) lumps may still be present — this is normal and resolves as integration completes.
This is also the window where the final shape becomes predictable. Assess your result at day 14 with fresh eyes.
What to do:
- If your injector recommended gentle massage for your specific area, begin it now (only if instructed)
- Resume all exercise and activities
- Book your 2-week follow-up if your clinic offers one
What to avoid:
- Aggressive facial massage or gua sha until 4 weeks
- Significant sun exposure to the face without SPF
Day 14 — Final result
At 14 days, swelling has resolved, integration is complete, and you can accurately judge your result. If you have concerns — visible lumps, significant asymmetry, less volume than expected — contact your injector for a review. This is the appropriate time for touch-up injections if needed.
The Restrictions That Matter Most
No heat for 48 hours
Heat — from exercise, saunas, hot showers, sun exposure, hot drinks, or spicy food — dilates blood vessels. Dilated vessels leak more plasma into tissue, worsening both swelling and bruising. They also increase the mobility of the filler gel before it has begun integrating, slightly elevating migration risk.
No pressure or manipulation for 2 weeks
This covers: facial massage, gua sha, face rollers, sleeping face-down, tight face masks, and any professional facial treatment. Pressure on unintegrated filler displaces it from the intended location.
One exception: sleeping. Sleeping on your side does not generate enough sustained pressure to displace properly placed filler — this restriction is often overstated. However, sleeping face-down does press the filler-treated areas into the pillow for hours, which is more relevant. A silk pillowcase can reduce friction if you are a side sleeper.
No alcohol for 24–48 hours
Alcohol is a vasodilator and a blood thinner — it worsens both swelling and bruising. Even one glass of wine the evening after filler significantly increases the severity and duration of bruising in most patients.
No blood thinners for 24–48 hours post-treatment
If your provider cleared you to take them, ibuprofen and aspirin are fine to avoid for 24–48 hours post-treatment. Do not stop prescription medications without medical guidance — talk to your prescribing doctor.
Avoid dental work for 2 weeks
Dental procedures inject local anesthetic into the face and require manipulation of facial tissue. Both the injection pressure and the subsequent swelling can displace HA filler that has not fully integrated. If you have an urgent dental procedure, inform both your dentist and your injector.
What Normal Healing Looks Like vs. What Needs Attention
Normal:
- Swelling peaking at 24–48 hours and steadily resolving
- Bruising that changes color from purple → blue → green → yellow over 7–10 days
- Palpable lumps or firmness that gradually soften over 2 weeks
- Slight asymmetry that resolves as swelling resolves
- Mild tenderness or sensitivity at injection sites for 2–5 days
Contact your injector promptly for:
- Blanching (white patches) of the skin at or near the injection site — this may indicate vascular compression and is a medical emergency requiring immediate intervention
- Increasing pain that worsens after 48 hours rather than improving
- A lump that is warm, hard, and painful after day 5 (possible infection)
- Any visual changes (blurred vision, double vision, loss of vision) after facial injection — seek emergency care immediately
- Skin that appears dusky, blue, or mottled in the hours after treatment
Vascular occlusion — where filler inadvertently enters or compresses a blood vessel — is rare but serious. It presents as blanching and pain at the injection site within minutes to hours of treatment. All competent injectors carry hyaluronidase (the enzyme that dissolves HA filler) for exactly this scenario. Contact your provider immediately if you observe skin color changes.
Filler Area Aftercare: Notable Differences
Lips: Highest swelling of any area. Peaks at 24–48 hours, may look dramatically different from final result at this stage. See our lip filler aftercare guide for makeup-specific guidance.
Tear trough / under-eye: Most sensitive area. Swelling can spread to the upper cheek and lower eyelid. Cool compresses are especially important. Do not massage this area without explicit instruction — it is the highest-risk area for visible Tyndall effect (blue tint from superficial placement) if manipulated.
Cheeks and midface: Lower swelling than lips, but filler in this area requires the most time to fully integrate — assess at 4 weeks, not 2. The restriction that matters most here is pressure, not swelling: back-sleeping for the first nights protects a deep cheek placement more than any compress does. Full protocol in our cheek filler aftercare guide.
Nasolabial folds and marionette lines: Moderate swelling. Gentle massage (if instructed) is more appropriate here than in other areas.
Jawline and chin: Swelling is typically mild. This area tolerates resumption of normal activity fastest.
Protect Your Investment with the Right Aftercare Sheet
Dermal filler is not a set-it-and-forget-it procedure. The aftercare period — particularly the first 48 hours — is where patient behavior directly influences the final outcome. Patients who understand what they can and cannot do, and more importantly why, follow aftercare protocols at significantly higher rates.
If you are an aesthetic practitioner: giving every filler patient a professional written aftercare document — with your clinic name, the specific area treated, and a clear timeline — sets expectations, reduces anxiety calls, and meaningfully lowers complication rates. Related guides: lip filler swelling stages day by day · lip filler makeup aftercare · CoolSculpting vs Kybella
AftercareGen generates clinic-branded dermal filler aftercare sheets in under a minute.
Stop photocopying aftercare sheets
Generate Dermal Fillers aftercare instructions branded with your clinic name in under 60 seconds. 3 free sheets per day — no credit card.
Generate your first sheet freeGet the free aftercare template pack
Generators for all 13 aesthetic procedures plus practical guides on running aftercare in your clinic. Sent once — no spam, ever.
Frequently asked questions
About the author
Dr. Megan Cole, RN, BSN
Aesthetic Nurse Practitioner
Registered Nurse with 12+ years in medical aesthetics. Certified injector (AAFE) specializing in neurotoxins and soft-tissue fillers. Clinical educator for aesthetic nursing programs.
View profile