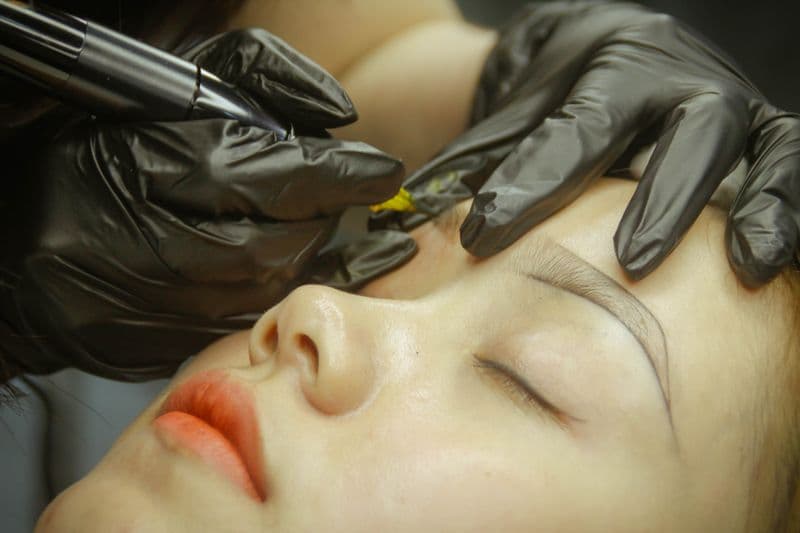
Microblading healing unfolds over 6 weeks, not 2. The surface heals in 10–14 days — the scabbing and peeling resolves, and you look presentable — but the pigment continues settling into the dermis for another 4 weeks. The most common mistake microblading clients make is judging results or panicking during the "ghosting phase" (weeks 2–4) when the color nearly disappears. It comes back. This guide explains exactly what you will see each week, and exactly what to do (and not do) to protect the result.
Why Microblading Heals Differently Than Other Cosmetic Procedures
Microblading uses a manual hand tool with a blade of fine needles to make small incisions in the epidermis and upper dermis, depositing pigment into the skin. Unlike tattooing (which goes deeper into the dermis) or topical cosmetics (which sit on the surface), microblading works in the transitional zone between the epidermis and dermis.
This depth is why:
- Results fade (the epidermis turns over completely every 28–40 days; pigment placed shallowly is gradually displaced)
- Touch-ups are required (typically at 6–8 weeks and then annually)
- Aftercare is critical — the healing skin determines how much pigment is retained
Any factor that accelerates epidermal turnover — sun exposure, retinol, AHAs, heat, friction — causes faster pigment loss. Anything that disrupts the healing scab prematurely — water, picking, makeup — removes pigment before it anchors.
The Healing Stages: Week by Week
Days 1–3: Fresh and dark
Immediately after microblading, the brows appear bold, defined, and significantly darker than the intended final result. This is because:
- The pigment is sitting on and just below the surface of the skin
- The skin is slightly inflamed and reddened around the strokes, making them appear more prominent
- There is some lymph fluid (clear or slightly yellowish) that may weep from the surface — this is normal
The brows at this stage often look heavier, more solid, and more saturated than you wanted. Do not judge the result yet. The color you see now is not the color you will have at 6 weeks.
What is normal: Mild redness around the brow area, slight swelling, darkening of the pigment, possible pinpoint bleeding at stroke sites (should resolve within hours).
Aftercare day 1–3:
- If your artist uses the "wet healing" method: apply the recommended ointment (typically a thin layer of Aquaphor or a specialized brow balm) 2–3 times daily to keep the area moist and prevent heavy scabbing
- If your artist uses the "dry healing" method: keep the area clean and dry; apply nothing unless instructed
- Do not get the brows wet
- Do not touch the area with unwashed hands
- Sleep on a clean pillowcase; avoid sleeping face-down
Days 4–7: Scabbing and peeling begins
As the healing process progresses, thin scabs form over the individual hair strokes. These are different from the thick scabs associated with wounds — they appear as fine, flaking skin over the strokes.
This is the most critical phase of aftercare. Do not pick, peel, or scratch the scabs. Removing scabs before they naturally fall away pulls pigment out of the dermis — creating gaps in the strokes (called "fallouts") that require touch-up to correct.
The brows may also itch during this phase. This is a normal sign of healing. Gently pat the area if itching is severe — never scratch.
What is normal: Flaking, peeling, and some lifting of the skin over the strokes. The brows may look uneven or patchy as different strokes peel at different rates.
Aftercare days 4–7:
- Continue the ointment or dry healing protocol as directed
- Pat dry the brow area after washing your face — never rub
- Use a fresh, clean towel each time
- Avoid steam (steam rooms, facial steamers, very hot showers)
- Do not apply makeup over the brow area
Days 7–14: Surface healing completes
By the end of week two, most of the peeling has resolved. The surface of the skin looks smooth and healed. However — and this is where most clients become alarmed — the brows may look significantly lighter than you expected. Some clients feel the strokes have almost disappeared.
This is the beginning of the ghosting phase. It is completely normal.
What is normal: Significant lightening of the pigment (sometimes appearing to have faded 60–80% from day 1), smooth skin surface, no more scabbing.
Aftercare days 7–14:
- Stop applying ointment unless your artist specifically instructs you to continue
- You can now wash normally over the brow area
- Continue avoiding sun exposure, retinol, and AHAs near the brows
- Makeup can be applied to the rest of the face; continue avoiding direct application on or over the brow strokes until day 14
Weeks 2–4: The ghosting phase
This is the most psychologically challenging part of microblading healing. The surface pigment has shed with the healing skin, and the dermal pigment is not yet fully visible through the skin above it. The result looks very light — sometimes so light as to appear like the procedure did nothing.
What is actually happening: the dermis beneath is holding the pigment, but the newly healed epidermis above it is temporarily opaque as new skin cells form. As the new epidermal cells mature and become more translucent, the dermal pigment becomes visible again.
You do not need a touch-up during the ghosting phase. Wait until week 6 before assessing results.
What is normal: Brows appearing 40–70% lighter than day 1, soft or barely visible strokes, feeling like the procedure failed.
Aftercare weeks 2–4:
- Avoid all chemical exfoliants near the brow area: no retinol, AHAs, BHAs, vitamin C, or glycolic acid
- Apply SPF 30+ daily to the brow area and surrounding skin — UV exposure is the #1 cause of premature pigment fading
- No tanning beds
- No facials, microdermabrasion, or chemical peels near the face
- You may use brow makeup if desired to fill in while the ghosting phase resolves
Weeks 4–6: Pigment resurfaces
The color gradually returns as the epidermis matures and becomes more translucent. Hair strokes become visible again, typically softer and more natural-looking than they appeared on day 1. The final saturation and definition of the strokes becomes clear.
At week 6, you can accurately assess:
- Whether the color is the shade and tone you wanted
- Whether any strokes have significant fallout (gaps)
- Whether you want a touch-up to add density or adjust shape
Most clients require a touch-up at 6–8 weeks. This is not a sign that the initial work was poor — it is a normal, expected part of the microblading process.
Months 1–12: Long-term maintenance
Microblading results typically last 1–2 years before requiring a refresh, depending on:
- Skin type: Oily skin breaks down pigment faster — clients with oily skin often see fading at 12 months; dry skin types may see results last 18–24 months
- Sun exposure: UV accelerates pigment breakdown; consistent SPF use extends results significantly
- Skincare: Retinol and AHAs used near the brows accelerate fading
- Color: Lighter pigments (blonde, auburn) fade faster than darker pigments (brown, black)
Annual color refreshes maintain the result and are less invasive than the initial appointment.
The Five Aftercare Rules That Protect Your Pigment
1. No water on the brows for 10 days
Water is the enemy of healing microblading. It softens the healing scabs and washes surface pigment away before it anchors into the dermis. This includes: rain, sweat, swimming, steam, facial misting, and washing directly over the brow area.
Showering: tilt your head back, use a visor or sweatband, and wash your face below and around the brow area with a facecloth, not directly over the brows.
2. Do not pick the peeling skin — ever
This is the most violated rule and the direct cause of most touch-up complaints ("my strokes have gaps" or "the pigment didn't hold"). Every time you pick a scab from a healing microblading stroke, you remove some of the pigment that was anchoring into the dermis with it. One pick can create a visible gap in a stroke that requires correction at your touch-up.
If peeling is uncomfortable, a tiny amount of Aquaphor applied with a cotton swab relieves the sensation and helps the skin separate naturally.
3. No retinol or AHAs near the brows for 4 weeks
Retinol and alpha hydroxy acids accelerate epidermal turnover — the mechanism by which they improve skin texture. During healing, this acceleration displaces pigment before it anchors. After healing, continued use near the brow area causes premature fading. If your routine includes tretinoin or a strong AHA, apply them below the brow line only, and ideally not within 1 cm of the brow area.
4. SPF every day, forever
UV radiation breaks down the pigment molecules in microblading strokes the same way it fades tattoos. The brow area is constantly exposed to sun — even incidental exposure on your commute accumulates over months. An SPF 30–50 applied to the brows daily (as part of your normal SPF routine) is the single most effective thing you can do to extend the life of your results.
5. Attend your touch-up at 6–8 weeks
The touch-up is not optional — it is the second half of the procedure. It allows your artist to assess retention, correct fallout, refine shape, and deepen color in areas that faded more than expected. Skipping the touch-up is like stopping a course of antibiotics halfway through. Most initial microblading prices include the touch-up; if yours didn't, budget for it.
Dry Healing vs. Wet Healing: Which Method Is Right for You?
Artists use two approaches, and they give conflicting instructions:
Dry healing: Keep the brows completely dry and apply nothing. Allows thicker scabs to form. Associated with less pigment loss from ointment absorbing pigment, but scabs may be more uncomfortable and harder to resist picking.
Wet healing: Apply a thin layer of Aquaphor or specialized brow balm 2–3 times daily. Keeps scabs thin and manageable, reduces itching, and some artists report better pigment retention. Risk: applying too much ointment suffocates the skin and can draw out pigment.
Both methods work. Follow your artist's specific protocol — do not switch methods or add products they did not recommend. If they gave you dry healing instructions and you add Aquaphor on your own initiative, you may get an outcome they cannot predict.
First-Timer's Checklist: Week 1
- Do not get brows wet (shower with head tilted back or use a visor)
- Apply ointment as directed (wet healing) or nothing (dry healing)
- Do not touch brows with unwashed hands
- Do not apply makeup over brow area
- Do not exercise or sweat heavily
- Sleep on a clean pillowcase; avoid face-down sleeping
- Do not pick or scratch peeling skin
- Stay out of direct sun; wear a hat outdoors
- Take photos daily — you will want this reference when the ghosting phase hits
Complete Microblading Dos and Don'ts by Phase
Phase 1: Days 1–14 (Healing Phase)
DO:
- Follow your artist's specific wet or dry healing instructions exactly
- Sleep on a clean pillowcase — change it daily if possible
- Take photos every 1–2 days to track healing and have a reference during the ghosting phase
- Tilt your head back in the shower or use a sweatband to divert water away from your face
- Blot the area gently (never rub) if any moisture makes contact
- Protect brows from direct rain or facial misting
DO NOT:
- Get the brows wet directly for 10 days (no swimming, steam, hot showers over the face)
- Pick, scratch, or peel any scabbing or flaking skin
- Apply makeup directly over the brow area
- Touch the area with unwashed hands
- Exercise or sweat heavily for 7–10 days
- Sleep face-down for the first week
- Expose brows to direct sun without a protective hat or covering
Phase 2: Weeks 2–4 (Ghosting Phase)
DO:
- Apply SPF 30–50 to the brow area every morning as part of your normal routine
- Use brow makeup to fill in during this phase if desired — applying over healed skin will not affect the pigment
- Keep your touch-up appointment booked at 6–8 weeks
- Continue protecting from prolonged UV exposure outdoors
DO NOT:
- Apply retinol, tretinoin, AHAs, BHAs, glycolic acid, or vitamin C within 1 cm of the brow area
- Schedule facials, microdermabrasion, chemical peels, or laser treatments near the face
- Use tanning beds
- Panic — the ghosting phase is a normal and expected stage of healing
Phase 3: Weeks 4–6 and Beyond (Pigment Resurfacing)
DO:
- Assess results honestly at week 6 against your day-1 photos
- Note specific areas of fallout, color inconsistency, or shape adjustments needed for your touch-up consultation
- Continue daily SPF on the brow area long-term
- Resume normal skincare, keeping active ingredients approximately 1 cm away from the brow area
DO NOT:
- Judge results before week 6
- Book corrective work elsewhere before attending your included touch-up appointment
- Use retinol or AHAs directly on the brow area as a long-term practice (they cause premature fading)
Touch-Up Appointment: What to Expect
The touch-up at 6–8 weeks is not optional — it is the second appointment that completes the procedure. Many clients do not understand this until they experience the ghosting phase and assume something went wrong.
What happens at the touch-up
Your artist will:
- Assess retention — compare your healed result to your day-1 photos and the original mapping
- Identify fallout — areas where strokes did not hold pigment, visible as gaps in the hair-stroke pattern
- Evaluate color — determine if pigment has shifted in tone (some pigments develop a warm or cool cast after healing)
- Correct and fill — add new strokes to areas with fallout, deepen color in areas that faded more than expected, and refine shape if needed
- Adjust if necessary — clients who found their initial result too bold or too light can discuss corrections at this visit
Is my result bad if I need a touch-up?
No. First-appointment retention rates vary significantly between clients — oily skin types may retain as little as 50–60% of strokes, while dry skin types retain 80–90%. The touch-up is designed to bring all clients to a complete, finished result regardless of their skin type's initial retention.
Many experienced microblading artists consider the touch-up the most important appointment, because it is where they correct anything the healing process changed and deliver the final result.
Pricing note
Most microblading studios include the 6–8 week touch-up in the initial service price. Confirm this before your first appointment. Annual color refresh appointments (at 12–18 months) are typically priced at 50–70% of the initial service fee.
Related guides: microblading vs powder brows: which is right for you · lip blush aftercare healing stages
Clear written aftercare instructions are the difference between a client who follows the protocol and one who panics during the ghosting phase and calls in convinced the procedure failed. If you are a microblading artist: AftercareGen can generate a professional, branded aftercare PDF for your clients that walks them through every stage of healing — in under a minute.
Stop photocopying aftercare sheets
Generate Microblading aftercare instructions branded with your clinic name in under 60 seconds. 3 free sheets per day — no credit card.
Generate your first sheet freeGet the free aftercare template pack
Generators for all 13 aesthetic procedures plus practical guides on running aftercare in your clinic. Sent once — no spam, ever.
Frequently asked questions
About the author
Dr. Megan Cole, RN, BSN
Aesthetic Nurse Practitioner
Registered Nurse with 12+ years in medical aesthetics. Certified injector (AAFE) specializing in neurotoxins and soft-tissue fillers. Clinical educator for aesthetic nursing programs.
View profile